In the digital age, capturing screenshots has become an essential skill for Windows users. Whether you want to capture a moment, troubleshoot an issue, or create instructional content, knowing how to screenshot on Windows is a fundamental skill. In this comprehensive guide, we will walk you through the various methods, shortcuts, and tools available to make the process seamless and efficient.
Understanding the Basics
Before diving into the specifics, let’s grasp the basics of taking screenshots on Windows. Windows, being a versatile operating system, provides users with multiple options to capture their screen. The primary methods include:
1. Snipping Tool: Unveiling Precision
The Snipping Tool is a built-in feature that offers a precise way to capture specific areas of your screen. To use it, simply:
- Open the Snipping Tool from the Start menu.
- Click on “New” to initiate the screenshot.
- Select the area you want to capture, and the Snipping Tool will save it for you.
2. PrtScn (Print Screen): A Classic Approach
The PrtScn key is a classic method for taking screenshots on Windows. Pressing it captures the entire screen, but for more control:
- Press
Alt + PrtScnto capture only the active window. - Access the Clipboard by pressing
Ctrl + Vto paste the screenshot.

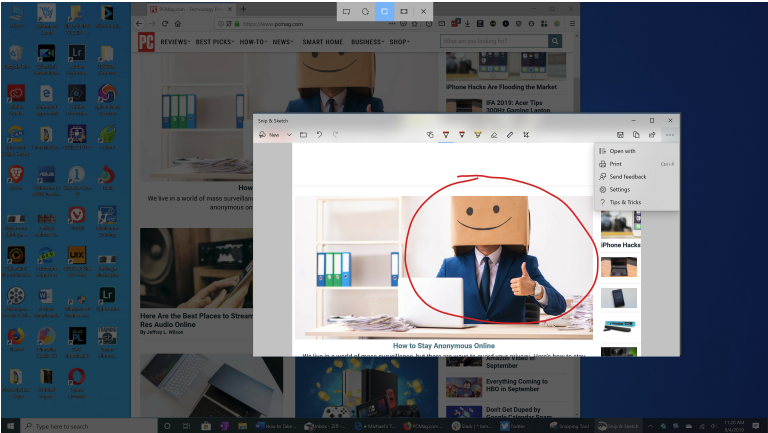
3. Snip & Sketch: An Enhanced Experience
For Windows 10 users, Snip & Sketch provides an enhanced screenshot experience. It allows you to capture, annotate, and share seamlessly:
- Open Snip & Sketch from the Start menu.
- Click on “New” and select the area to capture.
- Annotate or crop your screenshot as needed.
Leveraging Keyboard Shortcuts
Efficiency is key, and Windows offers several keyboard shortcuts for quick and easy screenshots. Memorize these shortcuts to elevate your screenshot game:
4. Windows + Shift + S: Snip on the Fly
This keyboard shortcut opens a snipping toolbar, enabling you to capture a specific area effortlessly. Once captured, the screenshot is copied to your Clipboard.
5. Windows + PrtScn: Instant Full-Screen Capture
Pressing this combination captures the entire screen and saves it as an image file in your Screenshots folder.
Exploring Advanced Tools
For users seeking more advanced features and flexibility, third-party tools come into play. These tools offer additional functionalities such as editing, capturing scrolling screens, and more.
6. Lightshot: A Lightweight Marvel
Lightshot is a third-party tool that allows users to capture screenshots, edit them on the spot, and share them seamlessly.
7. Snagit: The All-in-One Solution
Snagit is a powerful tool that goes beyond basic screenshots. It enables users to capture scrolling screens, record screens, and add professional annotations.
Table of Contents
Now that we’ve covered the essentials, let’s organize the information for easy navigation:
- Understanding the Basics
- Snipping Tool
- PrtScn (Print Screen)
- Snip & Sketch
- Leveraging Keyboard Shortcuts
- Windows + Shift + S
- Windows + PrtScn
- Exploring Advanced Tools
- Lightshot
- Snagit
8. Utilizing Editing Tools
Once you’ve captured a screenshot, enhancing it with editing tools can add clarity and emphasis. Windows comes with the Photos app, allowing you to make basic edits like cropping, rotating, and adding filters. This step ensures your screenshots communicate your message effectively.
9. Naming and Organizing Your Screenshots
An often overlooked aspect is organizing your screenshots. Develop a naming convention that makes it easy to identify each screenshot. Create folders for specific projects or categories, streamlining your workflow and making retrieval a breeze.
10. Optimizing for SEO: Alt Text and File Names
In the realm of SEO, even your screenshots can contribute to your website’s visibility. When saving your screenshots, use descriptive file names and add alternative text (Alt Text) where applicable. This not only helps search engines understand your content but also enhances accessibility for users with visual impairments.
11. Embedding Screenshots in Documents and Presentations
Screenshots aren’t limited to standalone images; they can be powerful additions to documents and presentations. When incorporating them, consider factors like alignment, size, and overall layout. This attention to detail ensures a polished and professional look.
12. Sharing Screenshots Effectively
Whether you’re sharing screenshots for collaboration or troubleshooting, choosing the right method is crucial. Utilize cloud storage services like Google Drive or OneDrive for easy sharing and collaboration. Additionally, consider using URL shorteners when sharing links to keep them clean and user-friendly.
13. Ensuring Privacy and Security
While capturing screenshots is a useful practice, it’s essential to be mindful of sensitive information. Avoid capturing and sharing confidential data unintentionally. If needed, use built-in tools or third-party applications that allow you to blur or redact sensitive content.
14. Staying Updated with Windows Updates
As technology evolves, so do the features and functionalities of operating systems. Regularly check for updates to ensure you’re utilizing the latest tools and enhancements. This not only improves your screenshot capabilities but also enhances the overall security and performance of your system.
Conclusion: Elevate Your Windows Experience with Expert Screenshot Techniques
In conclusion, mastering the art of screenshotting on Windows goes beyond the basic capture methods. By integrating advanced tools, optimizing for SEO, and adopting effective sharing practices, you can elevate your Windows experience. Whether you’re a casual user or a professional, these tips and tricks ensure that every screenshot serves its purpose effectively. Embrace these techniques, and let your screenshots become a powerful tool in your digital repertoire. Happy screenshotting!